返回
2022年08月19日
-
Struts2 Action访问Servlet API的两种方式(附带实例)
在 Struts2 中,虽然 Action 已经与 Servlet API 完全分离,但在实现业务逻辑时,还是经常要访问 Servlet API 中的对象。
通常开发时需要访问 Servlet API 中的 HttpServletRequest、HttpSession 和 ServletContext 三个接口,它们分别对应 JSP 内置对象 request、session 和 application。
在 Struts2 中,访问 Servlet API 通常采用两种方式,分别是通过 ActionContext 访问和通过 ServletActionContext 访问,本节将针对这两种访问方式进行讲解。
通过 ActionContext 访问
ActionContext 是 Action 执行的上下文对象,在 ActionContext 中保存了 Action 执行所需要的所有对象,包括 request、session 和 application 等。ActionContext 类访问 Servlet API 的几个常用方法如表 1 所示。
表 1 ActionContext 类访问 Servlet API 的常用方法 方法声明 功能描述 void put(String key, Object value) 将 key-value 键值对放入 ActionContext 中,模拟 Servlet API 中的 HttpServletRequest 的 setAttribute() 方法 Object get(String key) 通过参数 key 查找当前 ActionContext 中的值 Map<String, Object> get Application() 返回一个 Application 级的 Map 对象 static ActionContext getContext() 获取当前线程的 ActionContext 对象 Map<String, Object> getParameters() 返回一个包含所有 HttpServletRequest 参数信息的 Map 对象 Map<String, Object> getSession() 返回一个 Map 类型的 HttpSession 对象 要访问 Servlet API,可以通过如下示例代码方式进行:
ActionContext context = ActionContext.getContext();
context.put("name","mengma");
context.getApplication().put("name","mengma");
context.getSession().put("name","mengma");
在上述示例代码中,通过 ActionContext 类中的方法调用,分别在 request、application 和 session 中放入了("name","mengma")键值对。通过代码可以看到,ActionContext 类可以非常简单地访问 JSP 内置对象的属性。
为了让读者更好地掌握如何通过 ActionContext 类访问 Servlet API,下面通过具体的案例演示 ActionContext 的使用,具体步骤如下。
1)创建项目
在 MyEclipse 中创建一个名称为 struts2Demo02 的 Web 项目,将 Struts2 所需的 JAR 包复制到项目的 lib 目录中,并发布到类路径下。
2)创建页面文件
在 WebContent 目录下分别创建登录页面 login.jsp、登录成功页面 success.jsp 和错误显示页面 error.jsp,如 login.jsp、success.jsp 和 error.jsp 所示。
① login.jsp
<%@ page language="java" contentType="text/html; charset=utf-8" pageEncoding="utf-8"%> <!DOCTYPE html PUBLIC "-//W3C//DTD HTML 4.01 Transitional//EN" "http://www.w3.org/TR/html4/loose.dtd"> <html> <head> <title>登录页面</title> <style type="text/css"> input[type=text],input[type=password]{width:150px} </style> </head> <body> <div align="center"> <form action="login" method="post"> 用户名:<input type="text" name="username"/><br/> 密 码:<input type="password" name="password"/><br/> <input type="reset" value="重置"/> <input type="submit" value="登录"/> </form> </div> </body> </html>② success.jsp
<%@ page language="java" contentType="text/html; charset=utf-8"
    pageEncoding="utf-8"%>
<!DOCTYPE html PUBLIC "-//W3C//DTD HTML 4.01 Transitional//EN" "http://www.w3.org/TR/html4/loose.dtd">
<html>
<head>
<title>登录成功页面</title>
</head>
<body>
    <p>${success }<br/></p>
    <h2>用户登录信息</h2>
    用户名:${username }<br/>
    密码:${password }<br/>
</body>
</html>
③ error.jsp
<%@ page language="java" contentType="text/html; charset=utf-8"
    pageEncoding="utf-8"%>
<!DOCTYPE html PUBLIC "-//W3C//DTD HTML 4.01 Transitional//EN" "http://www.w3.org/TR/html4/loose.dtd">
<html>
<head>
<title>登录失败页面</title>
</head>
<body>
    <p>${error }<br/></p>
</body>
</html>
3)添加过滤器
在 web.xml 文件中配置 Struts2 的核心过滤器,配置后的代码如下所示。
<?xml version="1.0" encoding="UTF-8"?>
<web-app xmlns:xsi="http://www.w3.org/2001/XMLSchema-instance" xmlns="http://java.sun.com/xml/ns/javaee" xmlns:web="http://java.sun.com/xml/ns/javaee/web-app_2_5.xsd" xsi:schemaLocation="http://java.sun.com/xml/ns/javaee http://java.sun.com/xml/ns/javaee/web-app_3_0.xsd" id="WebApp_ID" version="3.0">
    <filter>
        <filter-name>struts2</filter-name>
        <filter-class>
            org.apache.struts2.dispatcher.ng.filter.StrutsPrepareAndExecuteFilter
        </filter-class>
        </filter>
    <filter-mapping>
        <filter-name>struts2</filter-name>
        <url-pattern>/*</url-pattern>
    </filter-mapping>
</web-app>
4)创建 Action
在 src 目录下创建一个名称为 com.mengma.action 的包,在该包中创建一个名称为 LoginAction 的类,该类主要用于业务逻辑处理,其代码如下所示。
package com.mengma.action;

import com.opensymphony.xwork2.ActionContext;
import com.opensymphony.xwork2.ActionSupport;

public class LoginAction extends ActionSupport {
    private String username; // 用户名
    private String password; // 密码

    // username的getter和setter方法
    public String getUsername() {
        return username;
    }

    public void setUsername(String username) {
        this.username = username;
    }

    // password的getter和setter方法
    public String getPassword() {
        return password;
    }

    public void setPassword(String password) {
        this.password = password;
    }

    @Override
    public String execute() throws Exception {
        // 获取ActionContext对象
        ActionContext context = ActionContext.getContext();
        if ("admin".equals(username) && "123456".equals(password)) {
            // 将用户名和密码信息放入context对象中
            context.put("username", username);
            context.put("password", password);
            context.put("success", "用户登录成功!");
            return SUCCESS;
        } else {
            // 定义登录失败的错误信息
            context.put("error", "用户名或密码错误,请重新登录!");
            return ERROR;
        }
    }
}
5)创建配置文件
在 src 目录下创建 struts.xml 文件,编辑后如下所示。
<?xml version="1.0" encoding="UTF-8"?>
<!DOCTYPE struts PUBLIC
    "-//Apache Software Foundation//DTD Struts Configuration 2.3//EN"
    "http://struts.apache.org/dtds/struts-2.3.dtd">
<struts>
    <package name="default" extends="struts-default">
        <action name="login" class="com.mengma.action.LoginAction">
            <result name="success">/success.jsp</result>
            <result name="error">/error.jsp</result>
        </action>
    </package>
</struts>
6)运行程序并查看结果
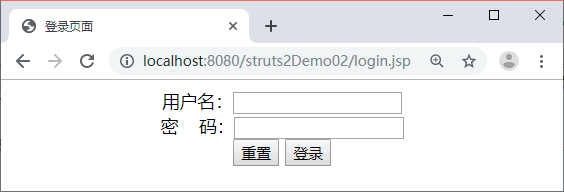
启动 Tomcat 服务器,在浏览器的地址栏中输入地址 http://localhost:8080/struts2Demo02/login.jsp 访问 login.jsp 页面,浏览器的显示结果如图 1 所示。